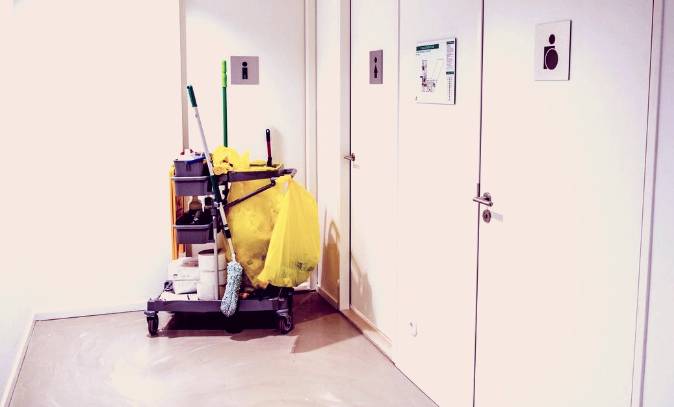
Jobs are everywhere in Australia, and a commercial cleaning company is a great job to have. This is where the person cleans commercial spaces, which includes construction sites. Other business spaces can consist of childcare facilities, gyms, offices, medical facilities, and so much more.
There are tons of new jobs posted all the time in the Australian area, and these locations are the perfect start to the discussions for the team. It’s crucial to keep these locations clean so that they can handle routine business without fearing the health or safety of the guests and staff.
Being a commercial cleaner is a major industry for the Australian area and can come with a decent salary.
With a clean environment, the business owner can impress their customers, maintain their brand image, and keep the business afloat instead of worrying about the mess. Companies often hire local cleaners, but they may not have the resources, knowledge, cleaning equipment, and experience to handle the job right.
Therefore, a professional cleaning team is required. With experienced team leaders and proper training, it’s easy to get the job done in less time and for less money and effort. However, each location has its own salary requirements, and there’s also the decision of hours and whether they are full-time.
Understanding more about commercial cleaning jobs in Australia can determine if they respect their customers and match the needs of the business in Australia.
About Commercial Cleaning
Commercial cleaning operations mean that the team cleans businesses, such as restaurants, bars, factories, and more. Basically, a commercial cleaner is a job where the person or team cleans various locations each week or day with appropriate resources.
There are so many new jobs opening up in Australia, so it’s crucial to find the right company to handle everything. Sometimes, the jobs entail specific tasks, such as houses, removal of furniture, and others. This could be a lucrative full-time job, and each week, the company might see different clients.
With so many jobs out there, commercial cleaners need various resources to keep up with the demand. Though these jobs often have a high salary, they mean a lot of work for a full-time business in Australia.
The team is required to clean the walls, floors, and furniture. With that, they must show respect to the company owners and worry about the health and safety of the customers visiting the location each week.
Why Is a Commercial Cleaning Job Good for You?
Commercial cleaners are in huge demand in Australia. Reputable cleaning companies like Clean Group pay a good salary plus many benefits to their cleaners. Also, some companies pay cleaners on an hourly basis.
Cleaning jobs in Australia are beneficial for many reasons. As a commercial cleaner, you can provide services on your own (become your own boss) or associate yourself with Clean Group to receive a stable salary along with benefits such as insurance, medical insurance, paid leave, and more.
All cleaners at Clean Group are trained in advanced cleaning methods using the most cutting-edge tools, equipment, and eco-friendly products. As a Clean Group cleaner, you’ll gain more useful experience in the industry with exposure to and a chance to work at a large variety of premises.
This will add value to your resume and further increase your chances of getting a high-paying job in the market.
You can also contact Clean Group to enquire about the current cleaning jobs in Sydney and Australia.
Commercial Cleaning Services
There are various commercial cleaner jobs on the market, and many of them are full-time. That means the person working at that job can handle multiple clients as part of a team. They have plenty of resources and provide various services.
Typically, these jobs require the person to be at the location. Many companies are located in Australia. They may work specific hours, but the commercial cleaners are paid a decent salary to handle the needs of the clients.
The services provided at the cleaning job in Australia can include removing dust/dirt from overhead pipes, cleaning the floors, moving around furniture, and other tasks. It’s up to the team to decide what they do with respect to the health and safety of the visitors to the business.
Here are just a few of the services the full-time team can offer:
Gym Cleaning Jobs
A gym is a humid environment, with sweat creating an ideal situation for mildew, mould, bacteria, and germs. These cleaning jobs require the team to wear protective gear and use bacteria-killing resources to ensure that the premises are clean and sanitary.
Commercial cleaners in Australia have a big job to do because they must sweep and mop the floors. However, that’s not enough for health purposes, so the team must also sanitize wherever they go.
Overall, this job is ideal for a commercial cleaner as part of a team. When they work full-time, they may have multiple gym clients and make a decent salary.
Childcare Cleaning Jobs
Childcare facility jobs are also in high demand. Though many people are now working from home, it’s still hard to have a full-time job with children. When living and working in Australia, the commercial cleaner must respect the company.
They must have the skills and machinery necessary to kill bacteria, fungi, and germs on surfaces. Generally, they are called into the job each week to handle floors and much more. Plus, these companies might be located in houses, so the hours might be a bit different.
Regardless, this job is essential to keep children comfortable and safe. The cleaning company in Australia must know how to handle the floors and walls, using the right equipment to get the job done.
Church Cleaning Jobs
Churches have many areas, so the job of cleaning them can be a bit tricky. Generally, a full-time team is employed once a week for routine care, but deep cleaning should be done a few times during the year.
The job of the church is to serve the surrounding community each day. Therefore, a commercial cleaner in Australia must be organized to ensure that the tasks don’t interfere with the regular functionality. With that, they may be employed to handle the houses of the support staff, giving them even more clients.
Medical Cleaning Jobs
Regular medical cleaning jobs are crucial for medical facilities. These are high-traffic areas that get exposed to bacteria and germs daily. Special care for the restrooms, chemicals, medical equipment, and patient rooms is crucial to ensure that everything is sanitary.
As the commercial cleaner goes about the job in Australia, they may have to notify the appropriate people of defective plumbing fixtures. It’s not all about cleaning; the goal is on creating trust with the clients to ensure that they continue calling the same company each week to handle the floors, walls, and everything in between.
School Cleaning Jobs
The school’s job is education, but that can’t happen if the kids get too sick to go to school. Australia is a great place to learn and enjoy life, but that also means that they need a full-time commercial cleaner.
These jobs are more difficult because of all the germs, dust, and infections. Generally, poor sanitation can lead to teachers and students being absent, and this costs a lot of money to compensate.
With a full-time team on board, creating a routine schedule each week is much easier. Plus, everything can be negotiated, including the hours and salary. With the right skills, the educational system is back on track, and these locations are clean and tidy.
Warehouse Cleaning Jobs
Disorganized and dirty warehouses can lead to accidents because of debris or dust on the floor and in the aisles. Warehouse cleaning jobs are crucial to have a positive environment, ensure there’s an accurate inventory, and increase efficiency. With all that, there are fewer accidents on the team.
Overall, the job of the commercial cleaner is to determine what the clients need each week. Australia is known for having many warehouses, with most of them being in Australia.
These locations often provide access to spaces where employees and visitors don’t go. Therefore, the cleaner might be required to remove dust/dirt from overhead pipes and other tasks that aren’t found with other clients.
Construction Site Cleaning Jobs
Construction sites are great locations to get jobs in the area. However, when the work is done, the crew leaves the construction sites a mess. In Australia, homeowners or business owners are required to clean it all up, creating disorganization everywhere.
Commercial cleaners can take on the job of cleaning these sites for their clients. They need the skills to know how to dispose of the items and must be able to work long hours to get things ready for inspection and all the rest. Generally, they get a higher salary per week or month than other job options.
Routine Cleaning in Australia
Depending on how big the building is and the traffic the business has each day, it might be wise to create a contract. A professional commercial office cleaner is more likely to do a good job each time if they know that they are the chosen one to come back each week.
With that, the company might offer a better salary each week when they know the skills of the commercial cleaner they hire.
Cleaning operations like this are designed to influence the brand image. Therefore, hygiene and a professional appearance are required in areas that customers might see. The company might not have the skills or education to do it themselves, so this work environment is perfect for commercial cleaners in the Australia Vic area.
The person’s job is to clean toilets, doorknobs, light switches, handles, and so much more. Overall, they are creating a safe and sanitary place to work, which might open up new jobs later.
When companies choose a commercial cleaner, they must discuss their cleaning needs. Generally, the salary is on a week-by-week basis, which focuses more on routine tasks.
However, they can ask for a larger salary when doing deep cleaning to remove dug-in dirt. These things often require access to better machines and the skills to use them efficiently.
Usually, the company provides a daily commercial cleaning list that focuses on the minimum tasks to complete. This also includes communal locations, such as lobbies, washrooms, breakrooms, and more.
Weekly cleaning lists might include deep cleaning or big tasks. Typically, vacuuming and mopping are always there and must be done each week.
Often, monthly cleaning lists are shorter and include things that employees and visitors rarely see. Still, they need to be checked for dirt and other issues periodically.
Rubbish and Recyclable Material
One of the jobs that the team might be required to handle is to gather up any rubbish and recyclable material and dispose of it properly.
Commercial cleaners in Australia must do what the company wants to earn their salary each week. Many locations tend to have old machines or furniture that must be disposed of. The commercial cleaner’s job is to do this effectively.
Since the commercial cleaner wants to focus on creating rapport with the Australian company, it is their job to do what is asked of them. This varies from place to place, but most locations have their own bins and dumpsters where old goods can be thrown away.
Responsibilities of a Commercial Cleaner
The phrase “commercial cleaner” represents a company or group of people who offer cleaning services for businesses. These jobs can be in shops, factories, and many other locations.
The cleaning services they provide vary in Australia, but most commercial cleaners have access to the staff and equipment necessary to remove dust/dirt from overhead pipes, dust desks, and empty trash.
With that, the job requires them to handle window cleaning, clean floors, remove stains, and much more.
In Australia, the person cleaning might be near machines. Therefore, their job is to be aware of their surroundings and notify the management when they see defective plumbing fixtures and other issues.
The exact responsibilities can vary based on the structure and size of the property. However, core functions include restoring supplies, cleaning, sanitizing, following a checklist, noting complaints, and handling any unexpected problems.
Cleaners need the right knowledge and skills to handle the job. They tend to have previous work experience or get on-the-job training. Once hired by the company, they get proper training on how to use the machines and all the rest.
Why Choose a Reputable Commercial Cleaner
A good cleaning company is there to keep the office or building space looking organized and clean. That way, the employees can do what they need to run the business. There are various jobs on the market, and the company chosen must prove that it can do what it claims.
In Australia, the cleaning industry now has various technologies to use. There are more powerful machines, better chemicals, and great tools. Plus, the company should promote itself on social media and search engines as being the best for the job.
Self-motivated individuals use many marketing tools to save time, get customers, and improve their skills for the job. Therefore, businesses in Australia must be aware of the trends, techniques, and technological advancements.
A reputable commercial cleaner also has to have great customer service. The customers must be satisfied, or they aren’t likely to recommend those commercial cleaners or use them in the future.
It’s best if the company chosen is local and in Australia. That way, it is sure to provide quality services. With that, it may request a lower salary for the team or one that is in line with trends. It may also handle various locations and work the hours required.
Innovation is crucial here, but that also means that the cleaners need the education to know how to operate new machinery. They need the skills to use the equipment and do a good job so that everyone is satisfied.
Usually, these companies offer various services, such as industrial and residential cleaning, strata cleaning, sanitizing, and more. Overall, they know what customers want and can fulfil those needs.
Commercial Cleaning Equipment
An excellent reason to hire a commercial cleaner or company in Australia is that they have the best cleaning equipment for a cleaning job in Australia, especially when it comes to deep cleaning., especially when it comes to deep cleaning.
The team also has the education and tools to handle the machinery safely. With various innovations, commercial cleaners have to understand what to do and when to do it.
For example, most jobs require the use of industrial vacuum cleaners. Though they look similar to the ones used in homes, they often have different attachments and features. It’s crucial to know how to use it effectively to get the job done.
With that, they may use steam cleaners, microfiber cloths, and green cleaning solutions. The options are limitless for those in Australia all a business owner has to do is ask. Here are the machines that cleaning companies in Australia tend to use most:
Industrial Vacuum Cleaners
The job of industrial vacuum cleaners is to suck up dirt, dust, and lose particles from soft and hard surfaces. Everyone on the team needs to understand when these machines are used in work areas.
Most jobs require a commercial cleaner to clean floors. With that, they need to get rid of the dust and germs. Dry vacuums suck up debris from the ceilings, walls, upholstery, and carpet. Some work areas get extensively dirty while each person does their job.
Hiring a commercial cleaner in the Australian area indicates that they know how to operate such machinery with the right skills. They may not use it for hours, but they do have to thoroughly get up all the dirt and debris from the floors.
Brushes
Most cleaning jobs require the use of brushes for different surfaces. Companies in the Australian area may want to consider a commercial cleaner who has hard and soft brushes and those for scrubbing. That way, the professional can remove stains and make the job easier for them.
Hard brushes tend to get heavy soil from carpets, but softer ones are used on smooth surfaces and furniture. Other brushes can include carpet, bottle, and toilet brushes.
Dry/Wet Mops
When going on jobs, the commercial cleaner should have a dry and wet mop. The dry mop is a dust-control option and removes debris from the flooring. Wet mops must be used with buckets. Its job is to remove dirt from hard surfaces.
Companies in the Australian area should have plenty of these mops, and each person on the team needs to know how to use them.
Brooms
Brooms are crucial to clean up loose dirt from the floors. Typically, the commercial cleaner uses this tool before the mop. Jobs like this are often easy for the cleaners and shouldn’t take a long time. However, it depends on how large the property is in the Australian area. It could take hours if there are multiple floors.
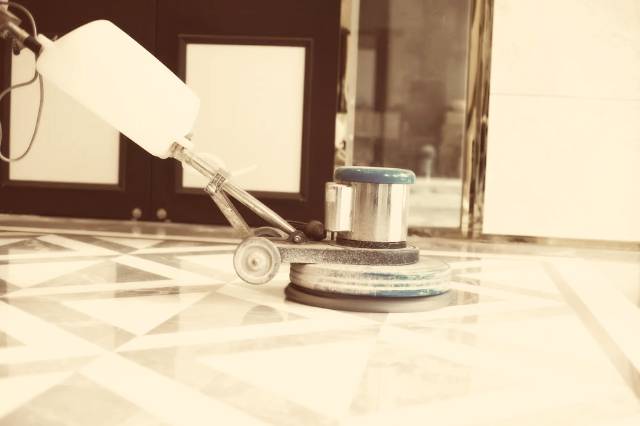
Some jobs in the Australian area require the commercial cleaner to use a hot water extractor. Its job is to scrub and polish floor surfaces. Therefore, it has small brushes that rotate to scrub the floor and uses water to do it. Sometimes, it can be used to shampoo carpets, as well.
Containers
Cleaners require appropriate containers to mix up solutions and store them. They tend to use buckets to mop water, but they may also have large containers that hold all the supplies.
Regardless, it’s important that they have everything needed when they start working. Otherwise, they have to stop, go back to the van, and come back multiple times, which is highly unprofessional.
Cloths
Typically, professional cleaners have different clothes used for cleaning. They are often colour-coded to prevent cross-contamination. For example, it is unhygienic to use a rag to clean the toilet and use the same one to wash dishes. Here are the most common cloth types:
- Dusters are used to buff dust and can be sprayed with water.
- Swabs are all-purpose cloths made of absorbent material. They are used to wet-clean or damp-dust surfaces, such as sinks and dispensers.
- Glass cloths are suitable for wiping mirrors.
- Scrim cloths are great for sandy glass.
- Rags are disposable and can be used for applying cleaning agents and polish.
- Wet clothes are great for hard floor surfaces.
Commercial Cleaning Chemicals
Commercial cleaning is different from a residential cleaning job. Commercial cleaners are used when offices or other commercial premises want a dirt-free environment. The goal for cleaning co-working spaces in the Australian area is to have a thorough clean and eliminate germs where most people work or visit.
To ensure the best results, the team may use special acids, solvents, or cleaners to handle deep cleanings for the Australian property. Overall, that’s why it’s better to hire a cleaning company in Australia instead of using in-house and untrained cleaners. They have the right knowledge and skills to ensure that everything is done properly.
Commercial Cleaning Tricks and Tips for Other Commercial Premises
Companies in the Australian area should leave the job of cleaning to the professionals. However, there are a few tips that they can use in-between visits from the commercial cleaner or team. These include:
- Change the Air Filter – A dirty air filter is unhealthy and expensive. That’s why companies in the Australia area should change the air filter each month or at the frequency that works best for them.
- Regular Carpet Cleaning – Commercial cleaners should vacuum the carpets every week, but that might not be enough. Therefore, it might be wise to ask the staff to do it each night before leaving, too.
- Prevent Rust – Check the legs of stools, tables, and chairs for rust. If it’s present, it could harm the carpets and also means that there could be defective plumbing fixtures in the vicinity that cause leaks.
- Change Carpets – When it’s time to buy a new carpet for the property, don’t choose something cheap or ordinary. It’s best to use synthetic fibres that are durable and long-lasting.
- Check the Outside – Pay attention to the outside areas of the building, such as tile, stone, and slate. They may need to be cleaned periodically. With that, there could be gaps or holes in walls that should be fixed so that pests can’t get inside.
Costs Associated with Commercial Cleaning Services
Commercial cleaners in Australia tend to charge $32/hour but may ask for a specific salary each week or month. Generally, this is considered the adult rate. However, some self-motivated individuals in the Australian area charge more. They may have special equipment or have other benefits.
In most cases, it’s best not to go with a commercial cleaner who offers a very low rate. They may not have the skills necessary to handle the job. Sometimes, they don’t live/work in the Australian area and add their transportation costs to the bill.
The cleaners’ job is to do everything on the list provided by the company, creating a healthier and safer place for people to work. Therefore, the salary must reflect that. In Australia, the price depends on various factors, which are discussed in more detail below.
Cleaning Rates per Square Meter
Each cleaning job in Australia requires a different treatment. Most companies don’t charge for cleaning on a per-square-meter basis.
However, some office cleaning job options in the Australian area do charge between $2 and $3 per meter instead of an adult rate per hour. Deluxe and more thorough cleaning from a commercial cleaner or team might be around $5.50/m2.
Commercial cleaning company rates per square foot are usually reserved for bigger offices and can range from $0.3 to $0.7 per square foot, depending on how many work areas are attached to the job. This also depends on the complexity of the job, office size, service type, and more.
In most cases, the Australian company doesn’t pay a salary to the cleaners. It’s usually an hourly rate, which is sometimes called the adult rate.
Regardless, the commercial cleaner should perform all the tasks listed by the company, creating a rapport and building trust with it.
Sometimes, a commercial cleaner bills between $1,100 and $2,800 per month for a 2,000-square-foot office with a washroom and kitchenette. This only includes basic cleaning needs.
As a general rule, there are lower cleaning rates per square foot when the office is bigger. However, special cleaning services may be on a salary or hourly basis and not based on the footage.
It’s also important to consider how many square feet a cleaner can tackle in one hour. According to Cleaning Times from the ISSA 540, someone can fully clean about 3,300 square feet each hour, depending on the variables.
Services Typically Offered by Cleaning Companies
A commercial cleaner in the Australian area provides different services based on the job. They typically offer basic and standard packages or different levels of cleanliness. There may also be extras or customizable cleaning packages.
These services differ based on the company, but here are the basic/standard cleaning services to request for the job:
- Restocking soap, towels, toilet paper, etc.
- Clean floors
- Disinfect toilets, mirrors, and basins
- Load the dishwasher
- Clean kitchen appliances (kettle, microwave)
- Wipe kitchen counters, tables, chairs, and cabinet doors to remove stains
- Wash kitchen floors
- Remove cobwebs
- Remove rubbish and recyclable material and dispose of them properly
- Empty and clean ashtrays and bins
- Mop and dry floors
- Clean, polish, and dust furniture
- Vacuum curtains, floors, upholstery, etc.
In addition to the traditional cleaning jobs in Australia, the team might offer specialized services for an extra charge. These can include:
- Cleaning hard to reach or cluttered spaces
- Cleaning ceiling fans
- Washing ceilings
- Scrubbing and sweeping special surfaces
- Dusting inside kitchen/file cabinets
- Waxing and stripping floors
- End of lease cleaning
- Cleaning car parks and roofs
- Interior/exterior pressure cleaning
- Carpet steam cleaning
- Grout and tile cleaning
- Internal and external window cleaning
- Other labour-intensive tasks
Specialty services like these tend to require more expertise and equipment. Therefore, the prices are higher. Still, they aren’t done as frequently, so the cost evens out in the long run.
What Determines Price for Commercial Cleaning
A commercial cleaner in the Australian area has a different job than those who clean homes. Public places require self-motivated individuals who understand the needs of other commercial premises.
Within the Australian area, cleaners must focus on different factors that affect the price of the job. They include:
- Frequency – A commercial cleaner often charges lower rates for return customers who require regular services.
- Time – Since commercial properties in the Australian area are public spaces, it’s easier to clean them during non-working hours. Usually, companies offer services on weekends and at night at a premium rate.
- Cleaning Supplies and Products – Commercial cleaners tend to use extra-strong products to kill germs in work areas. Therefore, this can cause the price of the job to be higher.
- Size of the Space – It takes longer to clean a big area. Since most jobs charge by the hour, expect to pay more if the office is large.
- Insurance – Most companies want to hire cleaners who are insured and bonded in Australia to protect them against damages.
Commercial Cleaning Rates in Australia (Per Hour)
The cost of a commercial office cleaning job in Australia is about $30 per hour. However, this is the lowest average rate throughout Australia. It’s possible to find a commercial cleaner offering $20 per hour.
Office cleaning companies in other areas charge $35 per hour. There are a few things to consider when pricing each company. For one, they need to be reputable. This means they are insured and licensed and have plenty of good reviews.
If they do a good job for others in the Australian area, it’s likely that they can tackle any cleaning task in Australia.
It’s also important to note that some cleaners have specializations, such as the ability to clean schools or aircraft. They need to have a reliable car, and the skills necessary to use different machinery and get from various locations on time and within budget. It’s crucial that they don’t make errors and can handle the needs of the client, such as ceilings and working around tanks.
Conclusion
Most companies don’t do their own cleaning because of the many hours it takes. These jobs are best left to cleaners who know what they’re doing.
Whether the staff doesn’t want to add hours to their workweek or the manager doesn’t want to pay for the extra hours, they tend to hire commercial cleaners to take on the tasks needed. Therefore, they are often reliable and have teams that can handle hospitals, schools, and almost anything else.
These people must be self-motivated individuals. Their work environment is one where they work alone and might report back to someone else later. However, they’ve got to be efficient because they are likely getting paid by the hour.
With so many Australia area businesses, it’s crucial to understand what the client needs. For example, hospitals require more sanitation and special services than schools.
There are plenty of new jobs being listed for cleaning operations in the Australian area. This means that each commercial cleaner can have all the hours they want to earn enough money to be comfortable.
Still, they must listen to the client, be reliable, and be on time. Hiring a commercial cleaner is probably the best thing to do for any company in Australia because it saves time and focuses on safety and health.
Why is a commercial cleaning job good for you?
Commercial cleaners are in huge demand in Australia. Reputable cleaning companies like Clean Group pay a good salary plus many benefits to their cleaners. Also, some companies pay cleaners on an hourly basis.
Cleaning jobs in Australia is beneficial for many reasons. As a commercial cleaner, you can provide services on your own (become your own boss) or associate yourself with Clean Group to receive a stable salary along with benefits such as insurance, medical insurance, paid leave, and more.
All cleaners at Clean Group are trained in advanced cleaning methods using the most cutting-edge tools, equipment and eco-friendly products. As a Clean Group cleaner, you’ll gain more useful experience in the industry with exposure to and a chance to work at a large variety of premises.
This will add value to your resume and further increase your chances of getting a high-paying job in the market. You can also contact Clean Group to enquire about the current cleaning jobs in Sydney and Australia.