Cleaning News - Commercial Cleaning Industry Tips - Page 24 of 70

Commercial Cleaning Industry News, Tips, Guide and Checklist

You can read here many helpful articles related to commercial cleaning, latest cleaning news in Australia, including how to find and hire the best cleaners in your budget, how to train a commercial cleaner, why hire a cleaner over doing it yourself, cleaning tips for a specific area like supermarket, retail store, data centre, pub & restaurants, hospitals, factories, buildings, and more.

How to Clean Metal Surfaces – A Thorough Guide

Rate this post

From jewellery and cutlery to entire surfaces, metal is an inseparable part of our lives due to its many properties. Unfortunately, metals lose their lustre and beauty if they are not properly cleaned.

We frequently clean metals as if they were any other object. However, they take a lot of elbow grease to keep clean. Of course, you can use any of the specialized metal cleaners that can be found on practically any store’s shelves. However, because many of these metal cleaners are highly hazardous, they may not be an ideal option for everyone. 

You’ll need some help to deep clean metal. That’s why we talked to our experts in the area about the best DIY solutions for cleaning the various types of metals in your home.

There is no one-size-fits-all solution for cleaning all metals. Some metal surfaces are more delicate, while others can withstand a lot of pressure. It’s helpful to know what kind of metal you’re cleaning. Otherwise, you risk leaving scratches and swirl patterns on the metal’s surface.

Remember that if the metal is highly tarnished, you’ll require professional help. Sometimes, a do-it-yourself project isn’t enough.

How to Clean Stainless Steel

Because stainless steel is a durable and easy-to-clean metal, it was first used in hospitals. Therefore, it’s no wonder that it’s also found its way into our homes.

Stainless steel does not imply that it is impervious to corrosion. If grime is left on it for long enough, it will eat away at the protective layer of chromium oxide, causing the metal to corrode.

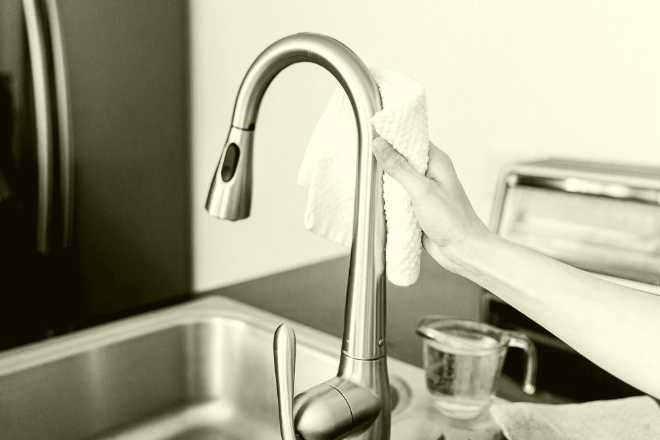
Using hot water and a soft, clean cotton cloth to wipe stainless steel is the easiest and most economical way to clean it. Stainless steel is quite easy to keep clean due to its natural qualities.

Another option is to soak it in soapy water for a few minutes before scrubbing it off with a gentle sponge. Note that steel wool should not be used since it can damage the stainless steel’s protective chromium oxide layer.

Alcohol can also be used to dissolve grease. Rub the oily patches with rubbing alcohol on a soft dry cloth until they are gone. To recover the metal’s natural shine, always dry it after you’ve finished cleaning it.

Baking soda and water can also be used to remove stubborn stains. Make a paste with it and use it to remove the stain. Keep in mind that, like salt, baking soda can be harsh and damage the metal. 

Before applying this paste on the entire surface, it’s a good idea to practice on a hidden area. After that, rinse with clean water to remove any remaining baking soda and dry it with a soft cloth.

How to Clean Chrome

This metal is shiny, yet it’s also fairly soft. It’s used for decorative purposes, as well as various typical household objects like faucets, pots, and pans. The truth is, these aren’t fully composed of chrome; instead, they have a chrome layer added to them as a finishing touch.

Chrome, despite its softness, is highly resistant to high temperatures. It’s also prone to stains and clouds, which is why it’s important to know how to clean it without ruining it, as cleaning it differs from cleaning other metals.

The most important aspect of cleaning chrome is to prevent it from becoming dirty in the first place. As previously said, chrome is a soft metal that requires more effort to clean the dirtier it becomes.

Consequently, the chrome surface is more likely to be harmed during the cleaning process. Wash your chrome surfaces as soon as you notice them becoming dirty. Chrome pots should never be washed in oily water since the grease will discolour them and it can be difficult to remove.

Water and dish soap are all that’s needed to keep chrome in a good condition. Simply fill a sink with water and give your chrome cutlery and pots a thorough cleaning. Keep in mind what we said about greasy water and chrome, and it should be fine.

You can use a piece of aluminium foil bathed in vinegar to clean rusty spots on your chrome objects. Scrub lightly so as not to scratch the chrome. If the rusty spots are severe, fine steel wool can be used, but use it with caution. After you’re done, clean it with water and dry it because chrome is prone to water spots, especially when compared to brass and copper.

How to Clean Aluminium

Aluminium is a relatively common metal, therefore, it’s no surprise that it’s used extensively in our homes. This list goes on and on from appliances to utensils and cutlery. The oxidation of aluminium causes it to become dull over time.

Additionally, the patina of aluminium oxide preserves the metal and isn’t hazardous to us. Aluminium that is clean and glossy is pleasing to the sight, so here’s how to keep it that way without damaging it.

A boiling solution of vinegar, lemon juice, or even simply boiling an acidic fruit like a tomato can be used to clean aluminium pots and utensils. Fill it halfway with water and a spoonful of vinegar per litre. If it fits, feel free to throw anything aluminium inside. The oxidation will be removed as a result of this.

Aggressive materials and detergents should be avoided. Steel wool may easily harm aluminium, which is a fairly soft metal. You can use it as a last resort, but always go with the grain of the metal and never use a circular motion.

To clean aluminium surfaces, you should cut a lemon in half and lightly rub the surface with it after dipping it in salt. Keep in mind that the salt grains can be harsh. If you don’t have a lemon, soak a towel in vinegar, sprinkle it with salt, and go to town on the aluminium surface!

Conclusion

Now that you know how to clean all the metal types of surfaces in your home without the risk of damaging them, you can invest more into your décor and furniture items. We hope that you’ve enjoyed this guide.

How to Clean a Fabric Chair

Rate this post

Hopefully, you don’t have to clean your fabric chair regularly. However, whether you’ve just purchased one of the best chairs on the Real Homes team’s list and want to keep it looking new, or you’ve received some hand-me-down upholstery in need of some TLC, knowing how to keep your furniture in tip-top shape is always helpful.

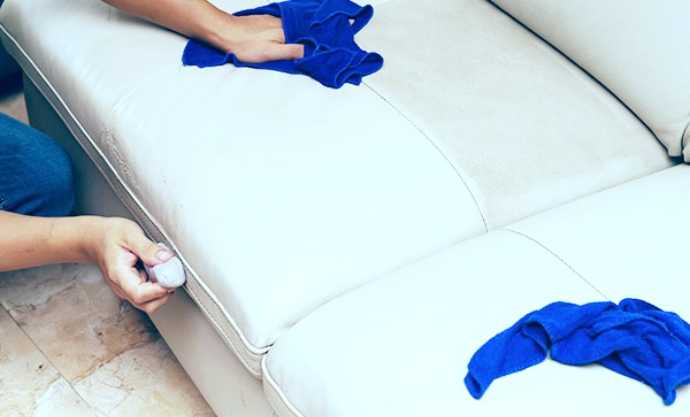
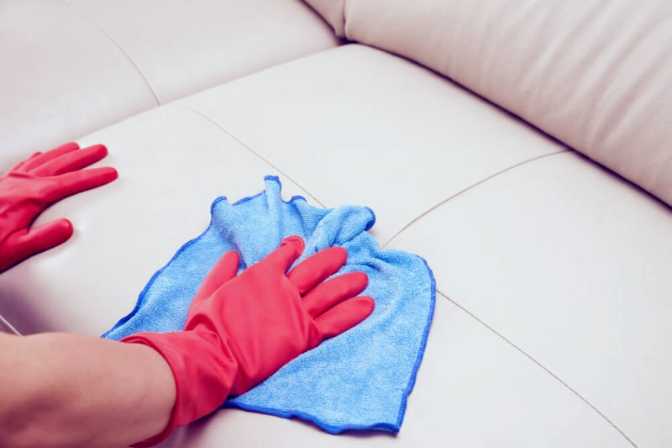
Whether you’re cleaning a vintage chair or a couch, this step-by-step instruction will walk you through the basics of commercial cleaning the fabric on these items using baking soda, vinegar, and, of course, your vacuum!

Vacuum the Chair to Remove Any Dust or Debris

You should do this at least once a week to keep your furniture free of dust and filth. Hoovering your upholstery regularly also prevents smaller particles from becoming embedded in the fabric, making the removal much more difficult.

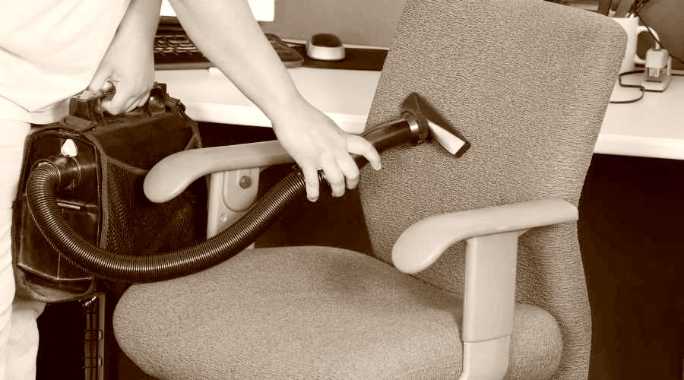
Remove any loose throw pillows, take them outdoors, and gently beat them to get rid of the dust. Then, using the fabric attachment and a gradual sweeping motion, vacuum all exposed sections of the sofa seat and back cushions, working left to right. Set the vacuum to low if you’re working with silk or linen.

If necessary, remove the cleaned back and seat cushions from the chair, place them face down on a clean floor, and vacuum their undersides. Next, using the upholstery attachment, vacuum the visible sections of the furniture. Then, change to the crevice tool to get into any edges, tufting, gaps, or button nooks.

Spot Clean Fabric Stains

Depending on the material you’re dealing with, use these simple spot stain removal procedures after vacuuming up any removable debris. Always read the label first. When cleaning upholstery, dab rather than rub firmly to avoid pushing dirt further into the fabric and distorting it.

Baking Soda

If you want to freshen up your fabric furniture, many swear by bicarbonate of soda or baking soda. Bicarbonate of soda is also an effective stain remover for linen. Simply sprinkle some onto the stain, wait a few minutes for it to work its magic, then vacuum it up and gently dab it away.

Baby Wipes

Choose the softest baby wipes you can find and dab at whatever has gotten on your chair with care. This should work for chocolate and oily fingerprints.

Upholstery Wipes

What if you don’t have any baby wipes on hand? To always have an emergency stain solution on hand, stock up on upholstery wipes. Wipe gently once again and choose one that matches the material of your chair.

Deep Clean Your Armchair

Laundry Detergent

Dilute your laundry detergent with water and spray it onto your chair. A liquid detergent works better than a powder because it needs a lower temperature to dissolve, and a powder detergent can leave smudges behind.

Vinegar

Combine half a cup of warm water and an equal quantity of white vinegar in a mixing bowl. Then, wet a microfiber cloth with the solution and dab the stain with it.

After that, dab with a clean cloth again after mixing a mild dishwashing agent like Dawn with some warm water. Rinse with clean water and remove any residue with a clean cloth. Allow it to dry.

Washing Machine

If your upholstery covers can be removed, and the care label specifies that they may be washed; vacuum first, then proceed following the care directions to the letter. Remember that placing them in a hot wash can cause them to shrink, making it harder to get them back on the furniture. If in doubt, opt for a gentle, cool wash and avoid tumble drying.

Top tip: Gently tug the fabric back into shape after it has been washed. Replace the chair covers while they are still slightly damp and air dry them. Any lingering wrinkles should be stretched out.

Don’t put the cushions back on the couch or armchair with the moist covers just yet; instead, set them up somewhere to dry completely before placing them and using them again.

Dry Your Fabric Chairs

Knowing how to properly dry fabric chairs after cleaning them is crucial, as many people make the mistake of leaving them out in direct sunlight or using a hairdryer to speed up the process.

Remember that strong heat from a blow dryer might harm the material (particularly while wet) and that direct sunshine can fade it.

Here are a few ideas for drying your freshly washed fabric chairs:

  • Dry the material as much as possible with paper towels, then place the chairs under a circulating fan to dry overnight.
  • Take the chairs outside and place them in a shady spot to dry. If it’s a windy day, you might want to rethink this decision because the unsettling dust and debris will make your fabric chairs look dirtier than they were before you cleaned them!
  • Open all the room’s windows and doors while turning on the ceiling fan at maximum speed. Increasing the room’s ventilation will assist in drying the material faster. 

Remove Pet Hair from Fabric Chairs

If your pets want to snuggle up on the couch with you, consider these upholstered chair cleaning tips. Put on a pair of rubber gloves and run them over your furniture to remove pet hair. The gloves create static electricity, which pulls the hair to the chair’s edge, where it can be easily vacuumed off. 

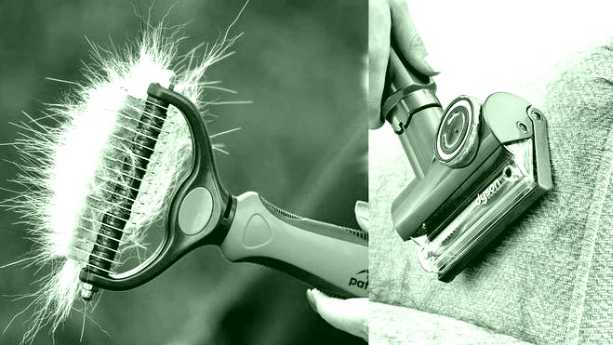
A DIY static spray can also be made by combining water and a small amount of fabric softener. Spray the solution on the chair and use a cloth to wipe away the hair. Furniture brushes and pet hair hand vacuums are two other excellent devices for cleaning fur from furniture.

Final Note

Even the best efforts at home aren’t always enough. If you spilled a full glass of wine on a fabric chair, a pet had a (smelly) accident, or anything else equally dreadful happened to the fabric chair, you should take it to a professional cleaner.

Allowing professionals to handle the stain may cost more, but it will take the stress off and ensure that your chair receives the best treatment option.

What Is the Best Cleaning Chemical for Ceramic Tile Floors

4.9/5 - (78 votes)

Choosing the correct tools and commercial cleaning solution to keep your tile floors in great shape is essential—plan to mop your tiles on a bi-weekly or weekly basis with a safe solution. You can also perform daily vacuuming or sweeping to remove debris and dirt that could end up on the floor.

Considering the specific needs hard surface flooring requires, cleaning product manufacturers have formulated solutions that are perfect for ceramic tiles. You want something gentle for the tile finish, so typically, using an acid-free formula is one of your best options.

Acid-free cleaning solutions can restore shine and remove dirt without making the tile slippery. 

Today’s article discusses six of the best cleaning chemical solutions for your porcelain, ceramic, or other types of tile flooring. 

Armstrong Flooring – Once’ n Done Cleaner

If you are looking for a cleaner that won’t damage your grout lines and is an effective, safe option for cleaning tile floors, then look no further than Once ‘n Done floor cleaner by Armstrong Flooring.

Use a damp mop or apply by hand with a clean cloth with no need to rinse off excess residue; this results in a shiny, clean floor without residue or streaks.

Making use of this tile cleaner at full strength may cause damage to the finish of ceramic tiles, so be sure to dilute it for everyday cleaning purposes. 

Black Diamond Stoneworks Ultimate Grout Cleaner

Dirty grout lines will keep your floors looking dingy even if you scrub your tiles all day long. You can take care of these issues with Black Diamond ultimate grout cleaner. 

This product contains an acid-free formula that is safe for white or coloured grout-like ceramic tile surfaces. After applying the product, give the solution up to five minutes to agitate the dirt, and then scrub the area gently before wiping clean with a damp mop or cloth. 

If you have grout lines that have become discoloured from soap deposits, oil, dirt, and more, you will find that this multi-step process isn’t an instant fix, but it does deliver a bright and fresh appearance. 

It’s good to note that Stoneworks ultimate grout cleaner is ineffective at cleaning grout that has become discoloured due to mildew or mould. 

Better Life Naturally Dirt Destroying Floor Cleaner

Better Life’s floor cleaning solution gives flooring a subtle but effective clean and is a tried and tested option among natural tile floor cleaners. This formula omits the usual suspects of conventional tiles cleaner and instead harnesses the power of 100% plant-based cleaning agents. 

Some harsh surfactants, such as petroleum, can not only cause damage to your ceramic tiles but are also harmful to the environment. The formula can be used without rinsing or diluting and squirted straight from the bottle onto the mop or cloth.

Better Life’s tile cleaner leaves your floors clean, streak free, and smelling great because it is naturally scented with essential oils. 

Auntie Fannie’s Floor Cleaner Vinegar Wash

You can use this tile cleaner concentrate with a microfibre cloth, floor cleaning machine, or mop. One of the best things about using Auntie Fannie’s floor cleaning vinegar wash is that it’s easy to dilute. 

This cleaner has a top safety rating from the Environmental Working Group, meaning it’s excellent for high traffic areas that see many pets or kids passing through.

You won’t need to worry about discolouring your grout lines when using this tile floor cleaner because Auntie Fannie’s floor cleaner is safe to use on grout too.

Auntie Fannie’s products utilize essential oils to provide a natural light scent for cleaning and preventing the pungent smell of vinegar-based products. 

Bona Hard Surface Floor Cleaner Spray

Bona Hard surface floor cleaner is a pH-balanced solution for keeping your unglazed or glazed ceramic tile flooring looking its best. This famous formula is Greenguard Gold Certified and water-based, meaning that it stands out from the crowd as a safe choice for a tile cleaner.

Easy to care for and durable flooring is what porcelain tiles are known for. A biweekly or weekly mop will ensure that your floors feel clean and smooth. Without a dull finish or residue, you can use the Bona Hard surface floor cleaner to clean your ceramic tiles effectively

Nature’s Miracle Hard Floor Cleaner

Choose a gentle and effective cleaning formula like Nature’s Miracle hard floor cleaner if pet fur, paw prints, or an accident has left a mark on your tile flooring. An enzymatic procedure counteracts lingering odours by vomit, faeces, urine, or even set stains.

This tile cleaner won’t affect the finish of your sealed tile floors and can be used as a spot cleaner in the case of pet accidents. If you are looking for a product that is pet-friendly and gentle enough for everyday use, you can trust Nature’s Miracle to deliver over and above your expectations.

How to Clean Stains on Ceramic Tile

Clean the tile surface with detergent and hot water, then paint with hydrogen peroxide if you have juice, tea, or coffee stains present. If you have grease stains, it is recommended to use a commercial floor cleaner or wash with water and club soda. 

Ink stains require bleach to remove. You can soak a clean cloth in diluted bleach and place it over the mark to extract the ink into the fabric. Once the stain is removed, make sure to wash the area thoroughly to eliminate all traces of bleach. 

If you want your tile floors to last for years and keep them looking lovely, it is crucial to know how to clean ceramic tiles correctly. 

Conclusion

It’s hard to beat the convenience of ceramic tile cleaning chemicals because not only does it provide you with a ready-mixed solution, it avoids having to go out and buy extra ingredients that you don’t have.

By choosing one of the cleaners on this list, you can be guaranteed a shiny and clean floor. Keeping your home spotless has never been easier, so don’t you think it’s time you put a cleaning routine into practice?

How to Clean a Smelly Drain

Rate this post

Do you ever detect an unidentified odour when you walk into the kitchen or bathroom? You may wonder to yourself, “Did the dog have an accident?” or “Is it the trash?”. The answer to those questions is no; it’s neither of these issues.

Finally, you realize that the sink is the malodorous offender. You may run the disposal and turn on the faucet, but the smell does not subside. You know that you are dealing with a smelly drain by this point.

Smelly drains can be a real pain in the butt and unsanitary for your family In this context, it is very important to clean the drain.

Fortunately, commercial cleaning, preventative measures, and a little investigating can freshen up the drain for good and eliminate the odour.

What Causes a Smelly Drain?

Various things can go wrong inside household pipes, so sinks are notorious for developing unpleasant odours. There are a few common causes of smelly drains, and these include but are not limited to:

Vent clogged pipes: Water can start to pool in the sink when debris clogs drain vents. The sluggish water movement causes stale odours. 

Bacteria and gunk build-up: Soap particles, grease, hair, food, and other gunk can coat the inside of your pipes. Even if the pipes don’t clog, the dirty residue attracts bacteria, releasing smelly odours.

Plumbing errors: Rotting drain tubes, leaks, missing vents, or traps can be the primary causes of stinky smells from the kitchen sink or bathroom.

Sewer gasses: Drains that receive infrequent use suffer from empty P-traps; this results in sewer gases rising through the drain. 

Rotten foods: Rotten food builds up in your drain over time and is different from strong-smelling foods. This problem occurs when you put any grease down your drain, and it attracts food, which then starts the decaying process. Foul odours are produced by these decaying items trapped in your drain. 

Smelly Drain Cleaning Supplies

Below we have listed all the supplies you need when cleaning your smelly drain. 

  • Ladder
  • Hose
  • Bucket
  • Wrench
  • Rubber gloves
  • Baking soda
  • White Vinegar
  • Near boiling water

You can now begin the cleaning process with the items listed above and remove that stinky smell. With a little bit of elbow grease and the know-how shared below, you leave your drain smelling fresh and clean.

How to Fix a Stinky Drain

Luckily, foul odours from the sink drain can be eliminated in various ways. Some combined methods work best and are recommended by many people to resolve this issue. First, start with the most basic options and move towards the more complicated ones if the latter doesn’t work effectively. 

The Hot Liquid Method

Before pouring half a pot of it down the drain, make sure to bring a pot of white vinegar or water to a boil. If you don’t have white vinegar, water will do perfectly fine. 

Give it a few minutes to work its magic, and then rise the pipes with cold water to solidify any lingering residue. Once the previous step is complete, pour the remaining vinegar or water down the drain to wash the left-over gunk away. 

The Vinegar and Baking Soda Method

Run the hot water tap at full blasted for one minute and then switch the water off. Start by dumping one and a half cups of baking soda down the drain, and then pour two cups of boiling vinegar into it. 

The concoction will fizz while removing the stubborn gunk causing those unpleasant odours. Flush the drain with the hot water tap once one hour has passed. 

Making Sure the P-trap Is Clean 

Before removing the curved portion of the drainpipe beneath your sink, make sure to put on rubber gloves. Empty any gunk or water from the trap into a container and then rinse the P-trap outside with a garden hose to remove stubborn grime. Before using the sink again, please remember to reassemble the plumbing. 

Clean the Drain Vent

In most properties, all drain vents lead to a single opening in the ceiling. You can use a ladder to climb on the roof and clear away any debris or leaves that may be clogging the vent. You may not believe it, but this obstruction is one of the most common causes of a smelly drain.

How to Fix Smelly Drains for Good 

  • Every time you dispose of food, ensure that you run the disposal and turn the faucet on for 30 seconds
  • Once a week, pour a few litres of near-boiling water down the drain
  • In order to keep the P-trap full in a rarely used sink, make run water through it occasionally
  • Adding mineral oil too infrequently used sinks can also help slow water evaporation

Smelly Garbage Disposal Solutions

It’s common for smells to emanate from the garbage disposal and not the pipes in the kitchen. Try this stink garbage disposal solution if you believe your trash disposal is causing an unsavoury smell. 

First, take a few small lemon wedges (keep in mind that other citrus fruits will work, too) and insert them into the garbage disposal. Next, turn the disposal on and run hot water to help freshen up the smell. 

Ensure that all the citrus has been flushed away by keeping the disposal on until the process is complete; it may take anywhere from 2 to 5 minutes.

With the help of the garbage disposal blades, acid from the citrus removes gunk or odour. If you want to keep your garbage disposal smelling fresh, this natural cleaning process can be repeated as many times as necessary. 

Why Does My Dishwasher Smell?

Dishwashers can be smelly because you are not rinsing your dishes properly before loading them. Over time your dishwasher’s crevices and filter can collect food particles, which lead to unpleasant odours. 

It’s essential to clean your dishwasher regularly to avoid smelly drains or dishwashers. Before going into the dishwasher, it is vital to scrape and rinse silverware bowls, plates, and other items. 

Conclusion

We hope this guide has been insightful and informative. With the guidelines set out for you, you can now go forth and get rid of that smelly drain once and for all!

Complete Guide to Clean Windows Without Streaking

Rate this post

If you have ever tried cleaning glass windows or tables, you know how frustrating it can be when dust and streaks are left behind. It seems almost impossible to get a shiny streak-free surface, no matter how much you wipe and spray on the surface.

However, it’s vital to know that having a streak-free surface is possible. One of the great things about the proper method is that it will take you less time overall. You can have spotless glass surfaces every time by knowing the correct commercial cleaning method for no streaks.

Today’s article explores ways to clean your glass more efficiently and leave it without streaks or leftover residue. Without further ado, let’s begin this piece.

Try a Homemade Cleaner

When it comes to cleaning glass mirrors, you will find that most commercial glass cleaners do the trick; if you want a non-toxic and natural formula using a product like Method may be your best option. Many brands are on the market, but Windex glass cleaner is the most effective and popular option.

You can also try making your own and keeping your own spray bottle if you don’t want to keep purchasing glass cleaner. Distilled white vinegar and distilled water are two things you probably already have at home, so you are already one step closer to having streak-free windows.

Hard water could leave grime and streaks behind; that is why it is recommended to use distilled water instead. When it comes to spots, magnesium and calcium accumulation in hard water tend to be the primary cause of streaks.

If you want an antibacterial and non-toxic cleaner for a fraction of the price, pairing a 50/50 ratio of white vinegar and distilled water will do the trick.

Throw Away the Paper Towels

Do you know what may contribute to grime and streaks being left behind? Paper towels! There is lint left behind by the majority of paper towels, which leave apparent marks on shiny surfaces like glass tabletops and mirrors.

It would help if you opted to use a squeegee or microfibre cloth instead. Using a clean t-shirt or old newspaper lying around can be an even more affordable route. The newspaper doesn’t hold up very well to moisture, so while cleaning your glass, make sure to keep a small pile next to you. 

Start at the Top

Working your way down from the top of the mirror or glass surface is one of the best glass cleaning tips. You will be able to wipe it efficiently as you work your way down because even if the cleaner drips, you can still remove the excess liquid. 

Grime and dust may be dislodged when starting at the top because they will possibly stick to the mirror below when it floats its way down. 

Without having to spend extra time cleaning, you can clean this dislodge dirt during the process. 

The Correct Technique

Instead of on the glass, you can spray the cleaner directly on your t-shirt, newspaper, and microfibre cloth. That is a recommendation to help you avoid drips if you don’t wipe up the cleaning solution quick enough.

Windows and mirrors with wood frames are other stories, so you need to be more careful when dealing with them. The wood can be damaged or warped over time if the product is constantly dripping on it.

You use more than you need when spraying on the glass because you cannot judge how much is applied. While cleaning your mirror, you may be more prone to leaving behind streaks if you produce too many suds.

By considering this tip, you’ll find that you need less than you think for a streak-free shine.

Polish It Out

It’s important to remember that it’s not always going to come out perfect when cleaning glass the correct way. You might still notice that there are streaks left behind even if you use a small amount of product, distilled water, and a microfibre cloth. 

Those streaks can be buffed out by wiping a dry cloth over them. When you use fast, light strokes over the entire window, mirror, or table, you will find that those pesky marks disappear quickly. 

The best thing about this whole situation is that the process only takes a few seconds to perform. 

Scraping Substances

In some cases, you may find sticky substances or residue cohering with your glass tabletop. If you want to eliminate creating even more mess or smear the substance across the table, using a glass cleaner on these types of stains isn’t a great idea.

A plastic paint scraper, card, or plastic utensil can be used for this clean-up procedure; plastic is recommended because it won’t scratch glass surfaces. We recommend dabbing stubborn areas with a bit of liquid soap, especially if you have a hard time removing the grime. 

Let the cleaning solution sit before wiping away the substance and dish soap with warm water plus a cloth.

How to Clean Glass Without Streaks: Use the Correct Technique

It is all about the products and techniques you use to clean your glass without streaks. Try a combination of white vinegar and distilled water or a commercial glass cleaner.

Instead of paper towels, use a newspaper, t-shirt, or microfiber cloth once you have the product ready. In order to avoid drips that you’ll need to wipe up, you should spray the solution on your fabric instead of the mirror.

In most scenarios, you will need to perform minimal effort and will have a streak-free shine in a matter of minutes. Remember to use light and quick motions when performing the final buff with your dry microfiber cloth.

If streaks persist, it is recommended to start the process from over so that you can achieve the desired result.

Conclusion 

We hope this article has been insightful and provided enough information to clean your glass without leaving streaks. By following the guidelines set out in the article, you can have a shiny and clean glass surface that is not only sanitary but streak-free too!

How to Clean a Shaggy Rug

Rate this post

If you are like most people, you love your shaggy or sheep-style rug, which brings a warm atmosphere to the home. However, a shaggy carpet quickly turns out to be a nest of dust and dirt if it is not maintained regularly. So how do you clean and keep your carpet looking good? This article will give you tips on how to clean a shaggy rug.

Guidelines for Cleaning a Shaggy Rug

The different ways to clean shag rug depend on the quality and shape of the fibres.

#1. By Beating the Rug

  • Hit the shaggy rug with a brush

Hang your shaggy rug on a strong branch, on drying wires, or on the floor, and then hit the rug with a brush. Beating is the best solution to rid the carpet of dust and other residues that is along the fibres.

  • Wait for the dust to settle

Next, wait for the dust to settle that you have hit out of the rug.

  • Repeat the whole process

Start again until there is little dust that comes off of the rug.

#2 Use the Reverse Vacuum Cleaner Function

After the threshing, the last resistant residue can be pushed through with a vacuum cleaner that is used as a blower. This function is mainly found on canister vacuum cleaners. If you have a leaf blower for the garden, even better!

  • Plug the hose of the vacuum cleaner into the air outlet filter

You might need to look for this, as it is not used much because many are unaware that it exists.

  • Make use of the small brush for drapes and armchairs.

You can use the brush attachment for your carpet, too.

  • Put the hose into place and use another brush, carpet, or no brush at all to vacuum

Take your time, the more time it takes to move the brush, the more efficient the work. At this point, you can replace the hose in its place and use another brush, carpet, or no brush at all to vacuum.

#3 Use a Bathtub

To fully wash the carpet if removing the dust isn’t’ enough, the bathtub is the best. For synthetic carpet, you can go up to 50°C without problem, but for wool, keep a maximum of 28°C to be sure that there are no issues. Here’s what to do:

  • Make use of Archimedes Principle

Fill the bathtub while thinking of Archimedes’ thrust theorem; in other words, remember that the weight of the shaggy rug balances the water so it does not overflow!

  • Add lanolin to the washing powder or washing powder rich in lanolin

For wool, add lanolin or take a washing powder rich in lanolin. It softens both animal and synthetic fibres, allows the detergent to enter and clean well, and when wringing or drying, it expels the rest of the water while protecting the fibres.

  • Remove the excess water

To remove the excess water, it can be wrung out by rolling it on itself, the fibres inward.

  • Use shower head for rinsing

When the shaggy rug has been washed, the rinsing is done with the showerhead. Do this until there are no more bubbles, and then wring out the rug, again.

  • Press the shaggy rug

Once the bathtub is empty, press the shaggy rug to remove more water, the less there will be, the less it will be heavy to carry.

  • Pull the shaggy rug and fold it up

Still in the tub, in pairs, pull the shaggy rug up and roll it up. When it’s just a big sausage shape, take it outside. It is best to have a large, clean tarp before laying the carpet on the ground.

  • Jumping on the rug does it well!

If you have children, ask them to jump on the mat and rest for a while! This helps to dry it!

  • Air-dry the shaggy rug

When most of the water is out, you can unfold the mat and finish air-drying it before brushing it off.

#4 Using 2 in 1 Shampoo

If you really need some cleansing, you can use a 2 in 1 shampoo. This must be a washing and detangling shampoo. For some fibres, a sponge will be used, for others, a nail brush for example, because the work is more precise than the brush broom.

  • Clean the shag rug in all directions.

You should clean the shaggy rug in all directions and do not rinse! Sponge as much as possible with absorbent towels by pressing on the carpet, or by walking on the towels. Remember, you can ask the children to do it, too! They love it.

  • Brush the fibres

Once dry, you can brush single fibres, but not take care with curly ones. For those, you can use other dry towels to rub vigorously on all sides of the fibres to restore their vigour. It’s not a job to be done every day, but the results are rewarding.

#5 Freshen the Rug by Using Washing Powder or Baking Soda

Use these at the same time. These are powders that are sprinkled over the entire carpet. The washing powder works on grease stains by absorbing them, and deodorizing the carpet, while removing the dust from the weft of the carpet, because it sticks to it and when vacuuming or beating.

  • Remove the powder from a shaggy rug with a vacuum cleaner

The carpet should not be kicked or beaten to remove the detergent; it must be removed with the help of a vacuum cleaner.

  • Add baking soda

Baking soda is a food product, but it can also be used for odour removal. The baking soda deodorizes and revives the fibres without really cleaning them. It is a product that can be used regularly but not for deep cleaning.

Conclusion

Dust and other dirt that is allowed to sink into the carpet can prematurely wear out the threads and knots at the base of the shaggy rug with time. It is therefore advisable to shake it regularly, clean it with soapy water, rinse, and brush your carpet in the direction of the pile to restore its beauty.

How to Clean Permanent Marker Off the Wall

Rate this post

Causes of Permanent Marker On the Wall

It sometimes happens, when we are in the middle of a brainstorming session with colleagues that our marker soaks through the pad of paper. Maybe you have an infant who has managed to sneak a Sharpie to their room and make a piece of artwork on their wall – accidents happen and it’s no one’s fault, but more importantly, it’s not as permanent as you think.

Tips for Removing Permanent Marker Off the Wall

When it comes to removing permanent markers off the wall, there may be a few commercial cleaning solutions worth trying before calling in the professionals to help with the mess.

Dry erase markerDepending on the surface of the permanent marker, something worth trying is taking a dry erase marker and writing on top of the mark. Once you have written over the permanent marker with a dry-erase, take a dry cloth and rub in a circular motion.

Repeat this until the mark starts to fade. When trying this approach, make sure to use matching colours between the dry erase and permanent.

Toothpaste – Using white toothpaste, apply a small amount to the space that has the markings. Rub the toothpaste around the marking. When using toothpaste, avoid the gel kind, rather use a plain white paste and let it sit on the mark for five to 10 minutes. Afterwards, scrub the area with a cloth and it should slowly rub off.

Baking soda – Using a sponge that has a gentle abrasive surface, apply baking soda on the scrub side. Make sure the scrub is slightly damp, then in a circular motion rub the area with the mark. If you begin to notice that the texture of the scrub is removing or damaging the wall – stop immediately.

These are a few home remedies to try when it comes to removing permanent markers from your walls. If all else fails, or you don’t feel comfortable doing it on your own, call in the professional cleaners to get the job done and right.

What to Consider When Cleaning Permanent Marker Off the Wall

Before you begin removing the permanent marker off your wall, consider the type of cleaning materials you are using, because some materials on certain paints can actually strip the area, which could result in more damages and problems.

To know what the best option is when removing permanent marker, consider the type of paint you have, and if it may be worth it to repaint the area rather than try to attempt and clean it.

Consulting with professional cleaners can help make this decision, as they would have the equipment and cleaning supplies to make an informed decision.

Still unsure if you should clean the marker yourself or hire a professional? Consider the following:

  • What kind of paint is on the wall? Was it painted a long time ago or is it fresh paint?
  • What kind of material is the paint on? Wood? Plaster? The material which the marker is on could determine or impact the choice of cleaner and approach.
  • Is painting over the area possible? Or, does it require cleaning?

In the circumstance that the spot with the mark can’t be painted over or that the material is not conducive to store-bought cleaning supplies, going with a professional cleaner may be the best and safest route.

Why You Should Remove Permanent Marker Off the Wall

Aside from the impact a mark could have on the aesthetics, a few reasons one should consider removing permanent marker from the wall is for professionalism and aesthetics.

Whether it’s a home office, commercial property, or warehouse, having a permanent marker on the wall or any part of the space can look unprofessional.

It can give off the wrong vibe, and because of this, business owners and professionals know the importance of having the permanent marker mark removed immediately, regardless of how big or small it is.

The other factor to consider when determining whether or not to have the markup of a permanent marker removed is the aesthetics and the impact it could have on the wall.

Depending on the cause of the mark, the ink could further bleed into the surrounding area. In some situations, the mark may not be bothersome; however, in professional settings, having it removed may be required.

In instances where the mark is located in a residential space, the mark could be simply covered up with a piece of artwork, furniture, or just painted over. These are relatively quick and cost-effective solutions.

On the other hand, if the mark is where potential clients and customers could see it, it may deter them from doing business with you due to the mark. Appearance is everything and having clean walls that are mark-free is important when you own and operate a business.

Leaving a mark on the wall could signal someone to think that you are not professional or that you don’t care about appearance, and this could turn away business.

Clean Group – Your Wall Cleaner and More

Businesses and homeowners in and around the Sydney area know that when it comes to all their wall cleaning needs, the Clean Group is a quick call and email away.

Providing over 20 years of experience in professional cleaning, the company prides itself in having the most affordable and reliable cleaning services.

When you contact the Clean Group, they can provide a proper and thorough assessment of your needs. Once completed, you can determine if the services rendered are more for an ad-hoc basis or if you are interested in regular professional cleaning services. Regardless of your needs and budget, the Clean Group has you covered.

Don’t risk your home or business, hire the trusted Clean Group, which has been serving the Sydney area for two decades. During the COVID pandemic, businesses and homeowners knew that they could trust and rely on the Clean Group to do proper and deep decontamination and sanitization of their spaces. When it comes to cleanliness, no one knows the best cleaning solution quite like the staff at Clean Group!

How To Clean Stone Benchtops

Rate this post

Granite, marble, quartz, and Caesarstone, are a few of the most known materials that are used when making stone benchtops. There are, of course, budget-friendly alternatives; however, these are expensive stones and installs for the most part. 

Given the costs of such fixtures, it makes sense that you want to do everything you can to ensure they are kept in excellent condition. This means making sure they are cleaned with suitable materials, as the wrong materials could damage the stone’s aesthetics. 

Do’s and Don’ts of Cleaning Stone Benchtops 

When it comes to commercial cleaning stone benchtops, there are a few do’s and don’ts to keep in mind that is going to help preserve and maintain your benchtops. 

Do’s of Cleaning Stone Benchtops 

  • Wipe it up immediately, no matter what it is. Spills or anything that could stain the counter should be wiped up as soon as you see it.
  • Read the cleaning products fine print, as some products are not meant for stone benchtops, while others have to be used under certain conditions. Read the instructions and test it in a small area where it isn’t noticeable if there is a counter-reaction. 
  • Use the right equipment to prevent any damage while cleaning the stone. There are bristles and porous cleaning scrubs that can do more harm to the stone benchtops than help clean them; therefore, it is best to use a cleaning cloth or plastic that won’t scratch the surface. 
  • Soap and water are sometimes the best remedies. Before you go and buy cleaning solutions to fix stains or spills on your stone benchtop, consider using a dishcloth soaked in warm water mixed with a few drops of dish soap. Wiping the surface area with warm water can help clean the countertop without any trouble. 

Don’ts of Cleaning Stone Benchtops

  • Walk away or ignore a spill, as the liquid or material could stain or damage the surface. Certain liquids are known to stain; therefore, ignoring a spill or even residue of the liquid could damage the benchtop. 
  • Use chemicals not meant for stone benchtops. Read the label and see whether or not the cleaning material you have is suitable for stone or not because some substances, when applied to stone, could lead to corrosion or peeling of the coat on the stone. 
  • Use hard or rough materials to clean as they can scratch or damage the stone. 
  • Place certain foods or items directly on the surface; this includes beetroot, berries, and oils. Beetroot and berries can stain the stone, while certain oils can damage it below the surface depending on whether the stone is porous or not. 

If you encounter a situation where you have stained, or you feel you may damage the stone, hiring professional cleaners to clean the stone could be a great route to take.

These are just a few dos and don’ts of cleaning stone benchtops. Hiring professionals such as the Clean Group leaves minimal chances of a mistake or accidentally damaging your stone benchtop. 

How to Clean Stone Benchtops 

Using a rag or dishcloth soaked with warm soapy water is the safest cleaning solution you can use. Most dish soaps do not have the same level or amount of chemicals that countertop or benchtop cleaners use; being mixed with water helps dilute the chemical strength. 

Rags and dishcloths are excellent materials to pick when wiping a stone benchtop as they are soft, and you can rest assured you won’t be scratching your stone. 

Maintaining Stone Benchtops from Getting Ruined or Damaged 

It is natural for our belongings to have wear and tear; however, some things can be done to lengthen the life of your benchtops.

Many of the things that can be done when maintaining stone benchtops are listed in the “do” section. When it comes to ensuring the aesthetics of the benchtop, cleaning and avoiding direct contact is the best way of avoiding any damages. 

It also helps to know what foods or substances could leave a residual stain or mark because, in this instance, you can put down a cutting board or cloth to avoid any direct contact.  

Unless you have owned a stone benchtop before or have had the unfortunate pleasure of ruining one, sometimes going with a professional for guidance and maintenance is the best solution. They know exactly what works and doesn’t work when it comes to stone benchtops. 

Cleaning Solutions with the Clean Group 

Hiring a professional cleaner is one way of ensuring your stone benchtops don’t get damaged, but more importantly, are correctly and professionally maintained. Professional cleaners have the training and understanding of items such as stone benchtops and more. 

Servicing in and around the Sydney area, the Clean Group has been ensuring businesses and homes have the best service when it comes to cleanliness.

Regarded as a leading professional cleaning company in the area, the Clean Group offers affordable services with the use of TGA-approved cleaning supplies and chemicals. 

The Clean Group offers over 20 years of commercial cleaning and disinfection experience. Providing their clients with the best customer experience and service, they understand the importance of having a proper and thorough deep clean.

They also understand the needs of their clients’ needs, which is why they can provide consultation and recommendations for any of their services. 

Why Hire a Professional Cleaning Company for Your Stone Benchtops?

Regardless of where and when your stone benchtops were installed or purchased, ensuring they last is essential is where a professional cleaner comes into play.

They have the experience to know what cleaning products to use, as well, they can also provide helpful guidance on how to maintain your stone benchtop.

Stone benchtops are unlike the standard laminate or wood counter; each stone is unique; therefore, the best way to ensure you have the proper cleaning and maintenance routine down pat is to have someone start and guide you.

Hiring a professional cleaning company not only is going to prolongs the life of your stone benchtop but also helps ensure the highest levels of cleanliness and sanitization.

How to Steam Clean a Carpet in Five Simple Steps

4.9/5 - (78 votes)

Carpets and rugs add warmth and personality to a home, not to mention extra comfort and style. Unfortunately, they do not stay fluffy and fresh forever, and they require special commercial cleaning to keep them looking and smelling good.

Steam cleaning is a great way to do this without spending excessive time and money. The process is pretty simple and makes a world of difference. Keep your carpets soft, clean, and cosy in just five steps using our easy DIY guide.

What Are the Benefits of Steam Cleaning?

Before we walk you through the process of how to steam clean a carpet, let’s take a quick look at the benefits of the method:

  • Steam kills up to 99.99% of bacteria naturally and quickly: more than most shop-bought products.
  • There are no chemicals and detergents needed, making steam the safer and healthier option.
  • You get a much deeper clean when using steam, as it penetrates much further into the fibres and pores.
  • The heat created by steam has the power to break down mess such as drink spills, paint, or glue.
  • Steam cleaners run on water: a cost-effective and eco-friendly cleaning solution.

Five-Step Guide to Steam Cleaning a Carpet

Step One: Remove All Obstacles

It is much quicker and easier to steam clean a carpet when nothing is in your way. If you can remove the furniture, do so, otherwise move everything to one area, and gradually work around it. Rugs should be taken to an open, dry, airy space free of obstacles where you can move around freely.

Having a clear path to steam is not only infinitely easier, but it also helps you ensure nothing gets missed so you can achieve the best final result.

Step Two: Vacuum First

You wouldn’t mop the floor before sweeping it first, so don’t do it with your carpets. Dust and dirt embedded in the pile interfere with the cleaning and make it more difficult for the steam to get into the fabric and properly disinfect.

Start by dusting the walls and skirting that adjoin the carpet or rug, then thoroughly vacuum the entire area you intend to steam. If you moved any furniture, make sure it is also dusted before going back into place.

Step Three: Prepare the Steam Cleaner and Carpet

Depending on the brand and model of your steam cleaner, there may be slight differences in the setup. Refer to the manufacturer guidebook for specific details. That said, they all function using pretty much the same idea: fill it with water, let it reach the desired temperature, and off you go.

Remember, you do not need to add any chemicals or disinfectants. Doing so could damage your machine (unless it states otherwise). Follow the instructions, and the power of steam is all you need.

The exception here is if you notice any significant stains. In this case, you may want to pre-treat these areas before you steam. You can buy a specialized pre-cleaner for this very purpose. It doesn’t cost much and is found in most big homeware stores.

Step Four: Clean the Carpet in Small Sections

Now for the main event: time to get steamy! It is best to work section by section, roughly one square foot at a time. It is also important to work slowly to avoid overworking the fabric. Go over each section a couple of times until you are happy that it looks clean, then move on to the next part.

You should start at the furthest corner and work your way out to avoid treading on the freshly steamed carpet. That way, you minimise the workload and maximise efficiency.

Step Five: Leave It to Dry Naturally

No blow-dry is necessary here- fresh air is the best solution. Open your windows and doors to let the breeze in. It is important to air it out as much as possible to avoid musty smells, so avoid tackling this task in the heart of winter!

If you are steaming a rug and live in an area with reliable, good weather, consider putting it outside (somewhere clean). Don’t leave it out in the sun for too long, though!

A Few Top Tips for Steam Cleaning Carpets

  • If it is the first time you are using a steam cleaner on a particular carpet, start by testing a small, discreet area. Some materials can react poorly to the heat of the steam, especially older carpets. Try out the machine on a section that is usually hidden, or on an extra piece of the same material if you have it available.
  • Cover your feet with plastic bags to minimize the impact of your shoes on the freshly steam cleaned carpet. It is best to avoid walking on it altogether for a while, but this is a helpful measure to take if that is not possible.
  • Don’t overdo it with the steam cleaner. Carpets are not meant to be streamed regularly, and doing so too often could lead to damage. When you use it, go gently and slowly, doing a thorough but delicate job. If you vacuum regularly and take preventative action to keep your carpet in good condition, it should not need steam cleaned for another two years.
  • There is no need to use detergent along with a steam cleaner unless you are trying to get rid of odours. Some dirt and smells require professional attention if you want to restore the carpet to its original condition, in which case steam cleaning ain’t going to cut it.

Final Thoughts

Steam cleaning is an excellent DIY housekeeping method and could completely change the way you care for your carpets. Forget exorbitant fees every time you want to spruce it up a little: simply invest in a good-quality steam cleaner.

Remember, some stains and smells still need a little more TLC- something that is best left in the hands of professionals. If you need more than a steam clean, The Clean Group has more than 20 years of experience and is on hand to help.

In short, steam cleaning your carpet is an effective way to spruce things up and take them as close to that brand-new look as possible. No chemicals, no mess, and no need to call for backup- this is one life hack you are sure to love.

How to Clean Walls with Sugar Soap

4.9/5 - (78 votes)

There’s nothing worse than old, stained basement walls. Having an old wall somewhere in the house feels like a rotten tooth in the mouth that we avoid fixing.

By avoiding cleaning and fixing a wall in the house that’s almost falling apart, we are putting the entire family at risk of breathing in mould, which can have severe consequences on human health. 

Old walls don’t look cool, plus they are unsafe. Even if there’s no mould involved, some walls can look old, peeling, or have stains that you don’t know how to remove. 

We all know how to clean ceramic surfaces, tiles, and even wood and marble, but how do we clean walls? There are millions of people around the world having this dilemma.

If you’re wondering if the best thing isn’t calling a professional commercial cleaning service and cutting off the family budget by a couple of hundreds to have someone clean the walls for you, then maybe you should hold your breath for a second. 

There are creative ways of finishing house chores that seem impossible. Stained walls are no fun, and it’s more than clear that cleaning them doesn’t sound attractive either. If you are still considering spending your hardly-earned cash on professional cleaners, stop there for a second.

There might be an easy way of cleaning your walls, and you’re not even aware of it. 

Introducing Sugar Soap 

No matter how sweet and sugary this sounds, sugar soap has nothing to do with sugar. It’s a granulated-looking powder that people use for cleaning walls.

So, sugar soap is a powerful chemical that also exists in liquid form, and it’s perfect only for cleaning large wall areas, like entire rooms, basements, bathrooms. 

Sugar soap is essential for cleaning the walls before painting them. The more preferred version is the powder rather than the liquid because it has better cleaning properties. 

Preparing walls before painting them is a crucial step that many people skip, therefore end up with a poorly done job. 

Sugar soaps contain skin-irritating ingredients, so extra caution while using them is always a plus. 

Why Use Sugar Soap? 

Walls get dirty, like it or not. Whether it’s grease on the kitchen wall, crayon paint in the kids’ room, old wallpapers, or nicotine stains, walls need to get cleaned before painting. There’s no doubt that this step can be skipped, but it will cost you extra work and money down the line. 

Washing a wall before a new paint coat maybe looks like more work now, but it will save you time later. When painting a stained wall, we are potentially causing more damage. Dirt and stains can develop in cracks and holes and cause serious harm to the walls. 

No matter how boring wiping down the walls before painting them may look like, this is one of the most crucial steps for adding longevity and a smooth finish to your walls. 

Imagine painting over old nicotine stains, your child’s greasy palm stains, or your dog’s muddy paws? No paint in the world would successfully cover this dirt, at least not long-term. 

Sugar soap is a powerful cleaning agent for walls that removes all dirt and uneven spots for even and smooth paint application. 

Think of it as a necessary touch to your wall before putting on makeup. You can’t put on makeup before first cleaning your face and removing all the sweat, dirt, and sunscreen. It’s the same with walls – they need to be clean before absorbing the new paint coat. It’s simple as that. 

How to Clean Walls with Sugar Soap 

Cleaning walls with sugar soap is not rocket science, although it requires extra caution. The liquid sugar soap is easier to use, but it’s more expensive. The powder sugar soap is more affordable, but as we said before, it contains skin irritants, so protective rubber gloves are mandatory. 

Get a bucket of warm water and dissolve the sugar soap in it. Get a brush or a cloth and soak it in the solution. Start wiping the wall, always being careful not to touch it with a bare hand. 

You will notice how all the grease, nicotine, old paint, and old wallpaper glue dissolve as you clean the wall. 

Clean your brush or cloth after every half a meter of cleaned surface and soak it again. Some stubborn stains take more time to dissolve, but you mustn’t give up and add more powder to the water. 

Although it is more work than just repainting your walls, cleaning them with sugar soap will lead to superb results afterwards, and you’ll feel happy not skipping this essential step. 

If you’re hasty about it, share your opinion with people who’ve already tried this wall cleaning method and then decide if it’s something that you’d like to do. However, painting experts always advise cleaning and disinfecting the walls before painting them. 

When you’re done wiping the walls with sugar soap solution, get a bucket of clean water and a new cloth, and repeat the same process to remove the soap from the wall. 

After these, give your walls time to dry before they are ready for paint application. If planning on cleaning your walls with sugar soap, do it when it’s warm outside or blast your A/C to help dry faster. 

Can You Use a Different Type of Detergent? 

There are plenty of other cleaning detergents for the household, but none is perfect for this purpose as the sugar soap. 

Other detergents can’t be easily washed from the wall as sugar soap, so no matter how excellent they are, they are simply not for cleaning walls. 

Not to mention that sugar soap is much cheaper than anything else you’ve tried, so that’s another fact that you can’t avoid.

After reviewing sugar soap, you’ll probably order your product right away and make the most out of your wall preparation. 

Final Word

In the end, it’s up to each and every one of you if you’re going to clean your walls before painting them. Nevertheless, we shared the importance of doing so with you, revealing an extremely affordable yet superb product that will help prepare your walls for painting and renovation.

Clean Group Sydney - Call Button Icon
1300141946 Clean Group - Get a Quote Icon Get A Quote